
How Can We Help?
Apple Developer
A paid $99 a year developer account is required to submit apps to the App Store, or download iOS, OS X, watchOS, or tvOS developer betas.
Before you set up a developer account, you have to make sure you have Two-Factor Authentication Turned on
Before you will be able to enable two-factor authentication in your Apple ID settings, you will first have to login to your Apple Developer account on your Apple device and enable two-factor authentication.
If you’re already using two-step verification and want to switch to two-factor authentication, then turn off two-step verification before continuing. View the link at the bottom of this article for more information on how to switch between these two verification options.
On your iPhone or iPad:
- Go to Settings.
- Tap Sign in to your [device].*
- Enter your Apple Developer account username and password.
- Complete the sign in.
- Tap Password & Security.
- Tap Turn On Two-Factor Authentication.
- Tap Continue.
On your iMac or MacBook:
- Go to the Apple Menu.
- Open System Preferences.
- Click on iCloud.
- Enter your Apple Developer account username and password.*
- Complete the sign in.
- Click Account Details.
- Click Security.
- Click Turn On Two-Factor Authentication.
* If you’re already signed in with another Apple ID, sign out of this Apple ID in order to be able to sign in with your Apple Developer account.
Once you’re logged in on your Apple device, follow these steps to enable two-factor authentication on your Apple Developer account.
- Login with your Apple Developer account on https://appleid.apple.com/.
- In the Security section, locate the ‘Two-Factor Authentication’ and click ‘Get started’.
Note: Two-Step Verification is not the same as Two-Factor Authentication. If Two-Factor Authentication is not available, you do not have a linked Apple device. You will have to make sure that you’re logged in on an Apple device with your Apple Developer account. - Follow the steps to enable two-factor authentication.
After completing the steps, two-factor authentication should be enabled on your Apple Developer account. You can confirm this by attempting to login on https://developer.apple.com/account/. After entering your credentials you will be prompted for a 6-digit verification code. This code will be sent to the Apple device on which you’re logged in with the Apple Developer account.
For more information and troubleshooting, please view the following articles by Apple:
- Two-factor authentication for Apple ID – Apple Support
- Switch from two-step verification to two-factor authentication – Apple Support
Now you can set up your developer account utilizing the steps below.
Step 1: Visit developer.apple.com
Step 2: Click Member Center.
Step 3: Sign in with your Apple ID.
- If you already have an Apple ID, you’ll just need to agree to Apple’s Developer Agreement to turn it into a free developer account. Type in your Apple ID and click Sign In.
- If you don’t already have an Apple ID, you’ll need to create one first. Click Create Apple ID, and fill out the required information and click Continue. You’ll then need to sign in with the Apple ID that you just created, and go back to the Member Center.
Step 4: On the Apple Developer Agreement page, click the first check box to accept the agreement and click the Submit button.
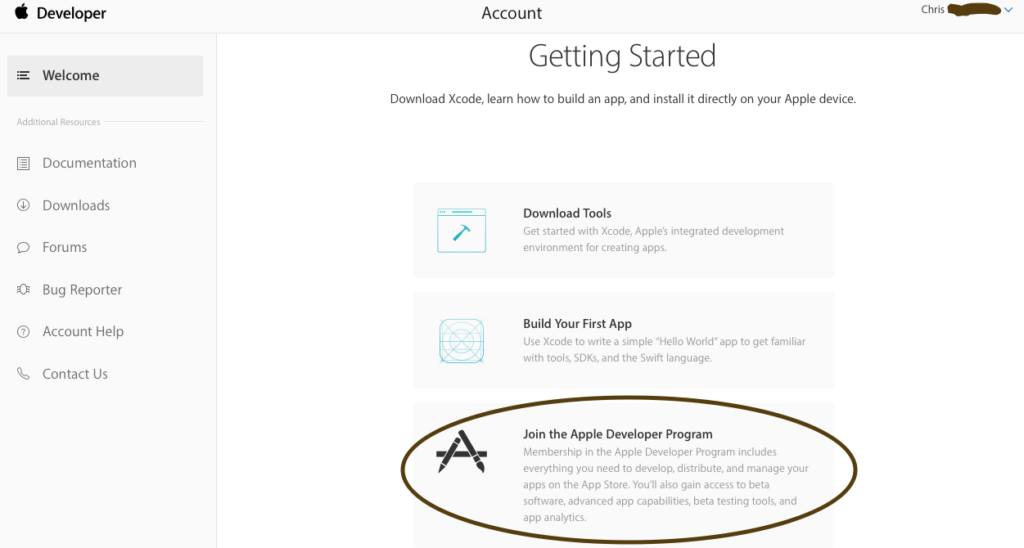
Step 5: From the “Getting Started” Page, select “Join the Apple Developer Program”
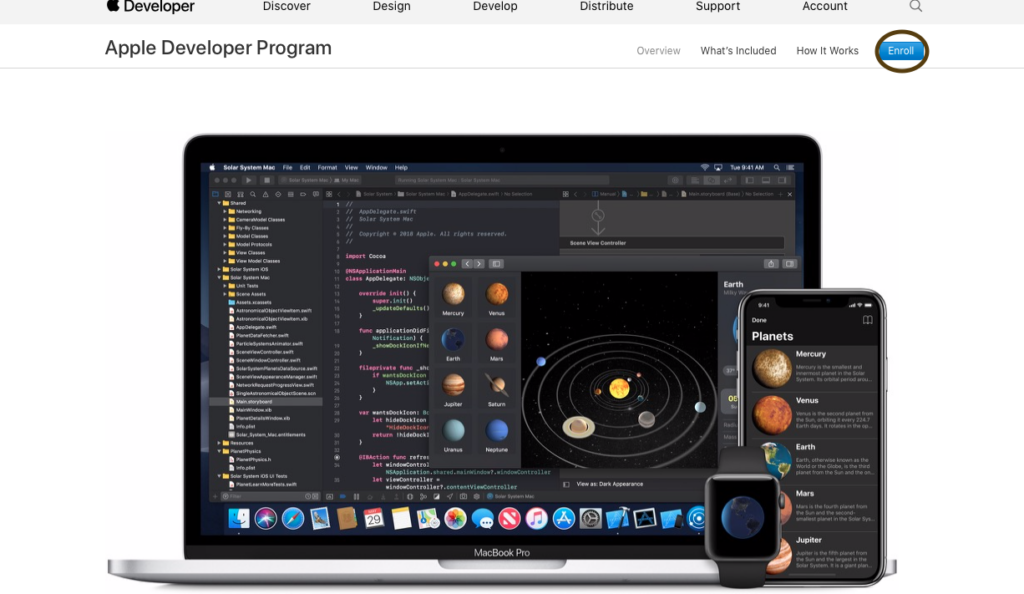
Step 6: On the next page, select “Enroll”
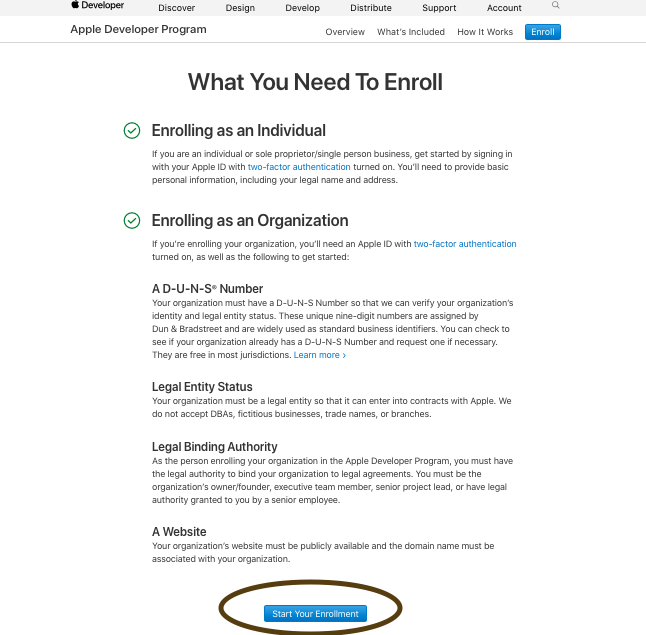
Step 7: Read over Apple’s requirements for selecting your entity type. Based on your Tax Filing Status Enroll as an Individual or as a Business.
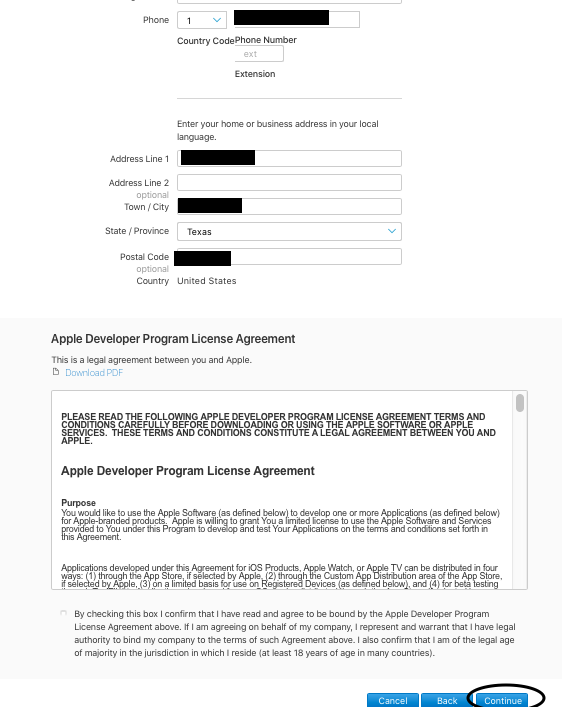
Step 8: Enter contact info then read Apple’s License Agreement select the check box at the bottom then click on “continue”
Step 9: Complete Payment
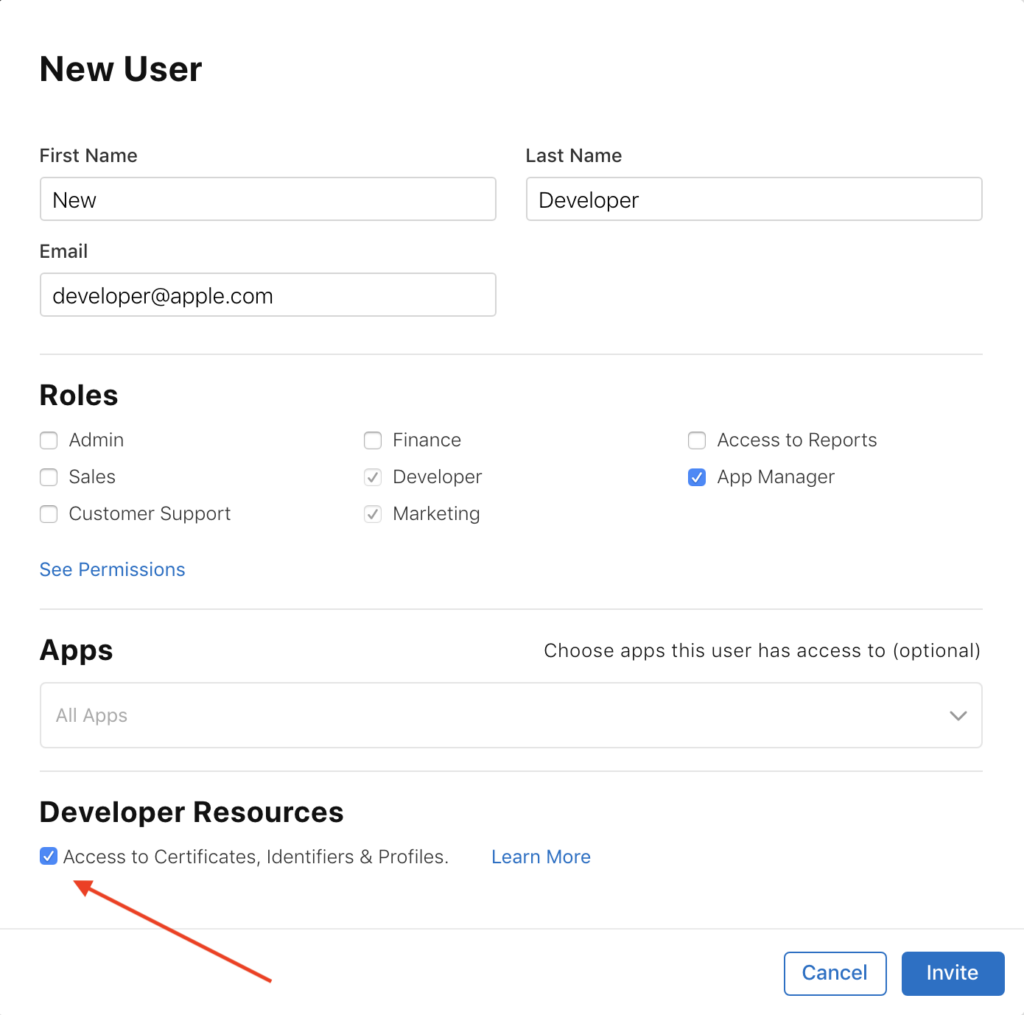
Step 10: Invite [email protected] as a User to your iOS developer account.
- Login to App Store Connect (https://appstoreconnect.apple.com/).
- Open the Users and Access section.
- Click the ‘+’ button in the top-left corner of the page.
- Enter the new users details as [email protected].
- Grant the user with at least the Admin or App Manager role.
- Enable ‘Access to Certificates, Identifiers & Profiles’.
- Click Invite to send an invite to us to be able to manage your account.
Once those steps are completed let us know at [email protected]