
How Can We Help?
Editing Content
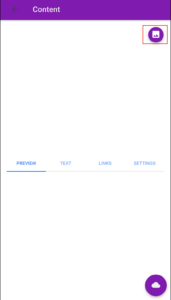
Step 1. Select Content
Step 2. Click on this icon to bring up the content menu ![]()
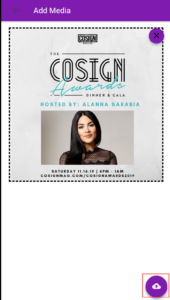
Step 3. Click on the image icon in order to set your featured image.
Step 4. When you select your featured image, click on the cloud on the bottom right corner to save the image.
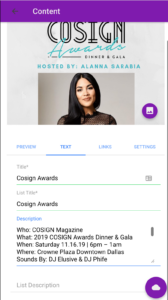
Step 5. Type in the Title, List Title and the Description. The description will be the long form body text in which you will write articles in.
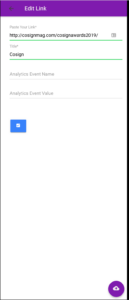
Step 6. When you click on the links tab, you can add in a link which goes to a ticketing website or the website where the article is. Set your link icon then click the cloud to save.
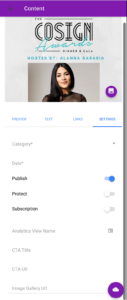
Step 7. Click on Settings, Set your category to match what you want the category to be. Set the date. Select Publish. You can choose to protect the content which would only be visible if the app user is logged in to the app. You can choose to make the content item apart of a subscription which would only be visible if the user is subscribed to your app via stripe and logged in to the app.
Step 8. Click on the cloud to save and publish the content to your app.